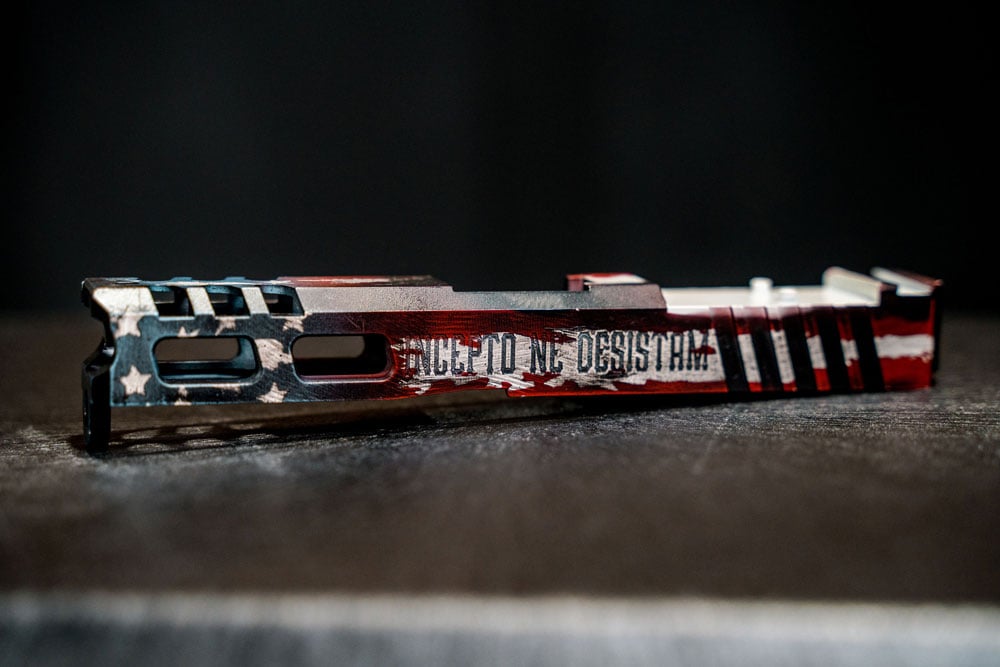
Whether you’re looking to start a business, or just want to give your rifle a fresh new look, Cerakoting is the way to go. Cerakote gives your weapon a durable and attractive finish. In this post, we’ll walk you through the basics of the process and outline what materials you need to get started. So read on and get ready to transform your firearm into a work of art!
 First Things First
The first thing you have to do when starting the Cerakote process is completely disassemble each project if possible. Parts left attached will often weep, meaning that oils will seep from the project, delaying your work. We’ve found that AK style rifles and bolt action/barreled action rifles are notorious for weeping for days. We teach tricks to fix weeping in our Training Class and on Applicator Hangout.
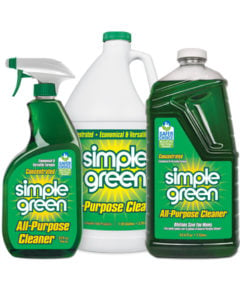
Degreasing is imperative. There are several ways you can degrease your parts using either undiluted Simple Green or acetone. Here’s what you need to know:
• Simple Green: Soak steel for 1 hour. Soak polymer and aluminum for no more than 30 minutes. Rinse thoroughly with hot water. Dry in the oven at 180°. Here’s one of our YouTube videos on using Simple Green: CLICK HERE
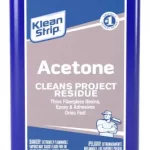 • Acetone: Soak steel for 1 hour. Wipe polymer, wood, plastic, fiberglass, etc with a clean rag with a small amount of clean acetone applied. Here’s one of our YouTube videos about using acetone: CLICK HERE
After you’ve degreased your parts, you need to outgas in order burn off any grease or oils left after the degreasing process. (This is when you’ll find out if you’ve got a weeping problem).
• Polymer, plastics, fiberglass outgasses at 180° for 1 hour. Carbon fiber normally does not need to be outgassed, but usually can be safely baked at 150° for 30 minutes (contact the manufacturer if you aren’t sure).
• Metal outgasses at 300° for 1 hour.
 Sand Blasting
Next, it’s off to the sandblast cabinet. You’ll need to use either 100 grit garnet or 100 grit aluminum oxide in order to achieve the etch pattern Cerakote requires. You’ll sandblast metal at 80-100 psi. All you need to do is remove the original coating and scuff the surface. You’ll be able to tell visually if the surface is evenly etched. With anodized parts, just scuff the anodizing; there is no need to completely remove it.
Polymer, plastic, wood and carbon fiber need to be sandblasted at 30-40 psi, just until the surface is dull. Start at the low end of pressure and slightly increase until you get to the pressure you need. You don’t want to start too high and damage the surface. When all your parts are blasted, be sure to blow them off completely with high-pressure air.
Here’s a YouTube video that talks about the importance of sandblasting: CLICK HERE
Prepping the Cerakote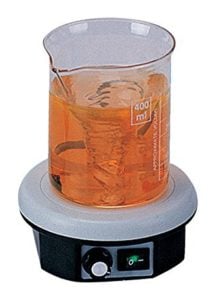
You’ll need to have your Cerakote ready to go before you start spraying. Shake all coating for a minimum of ten minutes to thoroughly mix the coating and solvent together. We’ve found that magnetic stirrers are a great time saver (you’ll also need the little magnets for the bottles if you use the magnetic stirrer). If you shake by hand, you have to pour your Cerakote within one minute to avoid the Cerakote settling and messing up your project. With the stirrers, you have them spinning right up to the moment you’re ready to start measuring. Here’s a YouTube video that talks about using the magnetic stirrers: CLICK HERE
For H-Series Cerakote, here are your ratios of Cerakote to hardener:
• 12:1 for a higher gloss (depending on color) and higher durability
• 18:1 for a standard gloss
• 24:1 for the lowest gloss (depending on color) and least durability
Bright colors are going to be glossier, dark colors will be duller. Please note that you cannot return unused coating to the bottle once the hardener is added.
Elite Series Cerakote can only be mixed at the 18:1 ratio. Again, do not return unused coating to the bottle once the hardener is added.
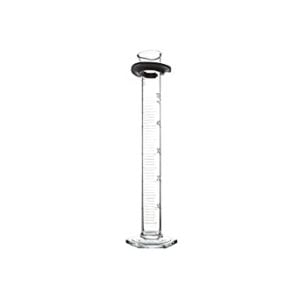 To measure out your coating, use a glass graduated cylinder (we only use Pyrex), adding the coating first then the hardener. We stretch a clean, powder-free nitrile glove over the opening of the cylinder and hand-shake for 30-90 seconds depending on quantity. Once you’ve mixed the Cerakote and hardener together, you have approximately two hours to use the mixture. This is two hours with it being in a sealed container such as your HVLP spray cup, not just sitting out in the open air.
If you decide to mix by weight, there are several apps and tables available online. We measure by volume because we’ve found it to be a time saver.
Before you just pour your shaken Cerakote into your HVLP spray gun, you’ll need to strain it. Each Cerakote product requires a different mesh, so be sure and read the Cerakote bottle to see what you need to be using. Common meshes are: 100, 150, and 325. Cerakote sells metal mesh caps that fit HVLP cups, or you can use disposable paper strainers.
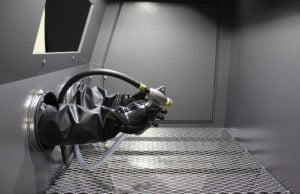
 Setting up Your HVLP Spray Gun
First, you’ll need to set the correct operating pressure. Open the needle up all the way, with no cup installed, pull the trigger, and hold it open. Look at the pressure gauge and set it to the needed operating pressure (H-Series=20 psi, all other Cerakote products=30 psi). Let the trigger go, install the cup, and strain the coating into the HVLP.
The top knob is the fan control. If you are coating in a tight space, leave it closed (all the way to the right)(This video will help you with spraying tight spaces). If you are doing all-over coats, give it a couple of full turns.
The middle knob is the volume. This knob will be set differently depending on whether the fan is open or closed, and for each color. Different colors and series have slightly different viscosities. There is no one setting for volume. A trick to get the right volume setting spraying is this:
• Hang a piece of white shipping paper on the wall of your booth, hold the spray gun 4-5 inches away from the paper, pull the trigger all the way and release.
• If the coating soaked in and looks like you can see through it, you ‘ll need to add a little more volume.
• If the coating is so heavy that it builds up and forms a “scab” to the point that you can’t see the paper, lessen the volume.
• What you want to see is a solid blob that soaks into the paper without building up, but that you can’t see through the paper
• Don’t adjust the air knob on the bottom of the spray gun; you’ll end up with inconsistencies when you’re spraying.
• Here’s a video to help with your HVLP setup: CLICK HERE
Once you’ve found your sweet spot for volume and the pressure is set, you’re ready to spray! Here’s the trick: you need to maintain the correct distance and speed.
Spraying Cerakote Correctly
You’ll want to maintain a consistent distance of 4-5 inches from your parts as you spray. Again, be consistent! You want the parts to be wet, but not to the point of running. One of the most common problems we see is applicators spraying too fast, which makes the coating too thin. The color may change, but there is little to no abrasion resistance.
 If needed, spray your parts then let them hang on a rack at room temperature for 15-25 minutes. Put them in the oven to “tack out” (more on that below). Remove them from the oven and give them a good look over. If there are areas where the coating isn’t applied thick enough, coat that complete area again with the same color. Hang the parts for the 15-25 minutes, tack them out in the oven again, look it over and if you’re happy with the result you can either continue with adding additional colors or fully baking it out. One tip if you are unsure if you’ve got the Cerakote thick enough is to use a thickness meter. These meters only work on ferrous metals but can be a helpful tool until you are comfortable with how it should look.
Here’s the trick: most coatings will have a 1-2 mil thickness when properly applied. Follow on colors for stenciling, battlewear or blending will only be heavy enough to cover the color underneath.
Be Careful About Dry Spraying Your Parts
Dry spray is caused by being too far from the part. What happens is that the solvent in the Cerakote evaporates in the air prior to the coating hitting the part. This happens when you are spraying at too high a pressure or from having set the volume of the HVLP too low.
Ambient Cure
Hanging your parts at room temperature after spraying is what is known as ambient cure. You’ll do this for every part prior to putting the part in the oven to tack or bake. What we do is set a timer for 15 minutes once the last part has been sprayed. However, there are certain times for different coatings, so be sure to check out the Cerakote Tech Data Sheet for the specific instructions for your coating.
This ambient cure is an important step because it allows the solvent in the Cerakote to evaporate. If this isn’t done correctly, what you’ll find is that the solvent gets trapped under the coating and looks bubbled when you take the part out of the oven.
 Tacking
This is the step that causes the most confusion. Tacking is a feel, not a time (this video may help). We tack our parts at 180°. Set a timer to remind yourself to check parts while in the oven. You’ll only remove the parts once they are 100% tack free (no longer sticky). Touch the part in an area you won’t leave a fingerprint (threads, an edge that will be under another part, etc). Proper tacking is important because you don’t want to add more Cerakote over a base that is not completely tacked out. Conversely, if you allow your base coat to get too hard, following colors won’t stick because Cerakote won’t stick to hardened Cerakote. Check this video: CLICK HERE
Tack-free is not the same thing as hard. There is only a window of minutes between a part being “tacked out” and hard, especially with brighter colors. A good rule of thumb is to just get it out as close to the point of no more stickiness as possible. If you have a heavy steel item such as a barrel, you can remove it when there is a slight stickiness left because it will continue to cure as it cools. However, make sure it is completely tacked out after it has cooled. Here’s another tip: polymer takes much less time than steel, so keep a close eye on it!
Allow your parts to cool completely before spraying more coating on them. Spraying hot parts will result in the solvent flashing into the coating and leaving shiny areas.
Final Bake
Another tip is to load your oven from back to front, with the steel in the back, aluminum in the middle, and polymer in the front.
After the ambient cure for your last color, put all of your items in for one last tack of around 20 minutes at 180°. Remove the metal parts and let the polymer parts bake for two hours at the same 180°. When the polymer parts are finished, remove them from the oven and increase the oven temperature to 250°. Load your metal parts and let them bake for two hours.
If you have Elite or Microslick coatings on any parts, we recommend spraying them separately since they have to be baked at 300°
If you are spraying optics, wood, flexible plastics, or carbon fiber, you can tack them with everything else at 180°, but we recommend final baking at 150°.
Notes for C Series Cerakote and Clear Coat
The upside for using Cerakote’s C Series is that it is an air cure product; no baking needed! The downside is that the C Series is not as durable as the H Series. Once you have sprayed C Series, it will tack out in approximately one hour. It will be hard in 24 hours, and completely cured in 5-7 days.
Once you’ve got your project fully baked or cured, you can add a clearcoat if you’d prefer. Spray clearcoat at 30 psi. Make sure your parts are cooled off! We recommend spraying clearcoat from about 8-10 inches away.
If you’re using the H Series clearcoat, it is recommended that you spray it wet-on-wet. What you’ll want to do is spray the basecoat, allow it to ambient cure for 25 minutes, then spray the H Series clear over that. Allow it to ambient cure for another 25 minutes, then bake at 250° for 2 hours. DON’T tack the basecoat in the oven before applying the clear.
If your project is using multiple colors of H Series and needs to be tacked in the oven between colors, you’re best to not use the H Series clear coat. Rather, MC Series clear coat would be a better option.
When using the MC Series clearcoats, you’ll need to fully bake/cure your project then spray the clearcoat. Allow your project to cure for 5-7 days.
And That’s It!
There are multiple steps to Cerakote properly. I hope this guide has given you the basics to get started. If you’re thinking of starting a Cerakote business, we would love to recommend our training course to you. Not only do we give you 100% of our tips, tricks, and secrets we share no where else, but we also discuss business topics such as marketing, workflow, and much more. We are very open about how we run our business and want you to be successful, as well.
 If you are simply needing more in-depth help with your Cerakoting, we’d recommend our membership site Applicator Hangout. We started Applicator Hangout as a means to separate ourselves from Facebook and YouTube in the event that either platform decides guns are bad and delete all of the content we’ve built up over the years. Applicator Hangout goes way beyond any information we’ve given out on YouTube and has the Facebook feel of news feeds, galleries, and your own profile like a personal Facebook page.
If you have any questions, feel free to email us at: [email protected]